How to plan a successful kitchen layout using zones
Let’s talk about a practical and logical design for your kitchen. Fair enough you want it to look fantastic. But when the honeymoon is over, what you want to be left with is a space that simply functions really well.
The space is not only for cooking. On any given day it’s for entertaining, technology (devices & internet), homework/study, household management, coffee centre, crafts, celebrations, socialising, unwinding after a long day, and more. It’s an all-purpose room or multi-functional hub which is really the “heart of the home”. You need it to function perfectly with a well designed layout.

I prefer not to use the famous Work Triangle, where the walking space between fridge, sink, and cooktop creates a triangle. But instead use Work Zones.
Zones are areas where you complete a certain task. Like, washing up, preparing food, and cooking. There are also lots of other tasks done in the kitchen, that’s why the Work Triangle theory doesn’t work anymore.
The idea of zone planning is to minimise the amount of walking around or straining yourself to get things out. So you arrange all items needed for one task nearby and within reach. It will create a better work flow and save you time and energy.
Some zones will be multi-functional or lap over to the next one. For example, you would need your kitchen sink in pretty much all zones.
Your physical space obviously dictates how much room you have. You may have to be clever and come up with some good ideas about how to incorporate everything.
Keep in mind the clearances around things. Make sure there's good traffic flow around the spaces. Also you might need to accommodate for more than one person working.
For some people, “Where am I going to put the kettle?” is the most important question. For others, they do some serious baking and need extra bench space. You should work out what’s best for your household so your custom kitchen will be truly custom. So work out your zones, you will need one for every activity you do in the kitchen. Here’s an overview of the main zones, to start with:

Blum have some fantastic tools on their website that will help you plan your kitchen to be the most efficient.
Cleaning Zone
checklist:
bench space
sink
dishwasher
rubbish bin - including food scraps and recycling
cleaning tools and products
This area is traditionally under a window so the person doing the washing up can look out. This way they can distract themselves from such a horrible task!
So often I see people putting their sink in the middle of their island bench. It’s a great idea because the kitchen tap is the most used item in the kitchen. But ask yourself the question, do I want the cleaning zone front and centre for all to see? Have a look for a better option. You might still be able to have a tap and small sink on the island but a bigger sink for washing to the side somewhere.
TIP: everybody always fights about who is going to empty the dishwasher. Store things like cutlery, plates and bowls within one step of the dishwasher. So it’s as quick and painless as possible.

Scandinavian apartment kitchen sink: Cleaning Zone
Preparation Zone
checklist:
bench space
chopping boards
knives and utensils
mixing bowls, strainers, mortar & pestle
measuring tools
appliances for prep work, such as blenders, mixers, etc.
plastic wrap, containers, and bags
herbs, spices, oils, sauces, and other small pantry items.
It's handy to have a place in this zone for the few pantry items or utensils you use often. It might be in a drawer, cupboard, a hanging rack or a tray on the benchtop.
The location for food prep is between your cooking and clean up zones, as well as close to your fridge. You'll only need about a metre width of bench space, unless you're really cooking up a storm!
You might need more than one Preparation Zone, meaning more than one bench area. It depends on how many people use the kitchen at once. You also might not have enough room to store everything close by. Put the things you don't use much in a more appropriate place.

Scandinavian kitchen Preparation Zone | Stylist: Jenny Martinsson
Cooking Zone
checklist:
bench space
cooktop
oven
microwave
any other cooking appliances that you use, breadmakers, grillers, etc.
pots and pans
other cooking/baking dishes and trays
utensils such as wooden spoons, ladles, whisks
You'd have many different appliances because of the different types of cooking you do. Think about which one you use the most and put it in the best position. For instance, I use the cooktop the most at my place so I put it on my island. This way I can cook and socialise or watch TV at the same time. The best place for an oven or microwave is at chest height. This is so you have easy access and you can easily see what’s happening inside.
TIP: when taking things out of the oven, you should pre-plan where to put it because it will be hot, hot, hot! Make sure there’s a heat proof bench space close by. I tend to put it onto my cooktop if it’s free.

Lavanche Sully cooking range with copper pots: Cooking Zone | french cooking school: The Cook’s Atelier
Storage Zone
Checklist:
Consumables (food)
Non-consumables
Your storage zones correspond with the task at hand. So there will be a few smaller zones scattered throughout the kitchen. Therefore, when you're working on something you don’t have to go far to access the things you need. Hopefully you won’t even need to walk there because it will be at arm’s reach.
Consumables: Most people would put consumables in a pantry where you can open it up or walk into it and see everything at a glance. This is helpful when you are trying to decide what to make for dinner. My husband likes to look inside the pantry many times throughout the day (just in case he missed something the last time). It’s his favourite pass time.
The fridge: cold storage zone. It’s the appliance that’s most used and often several people seem to need it at the same time. It’s often the hardest item to place because it’s quite deep and the door needs to open fully without obstructing anything. Also, most people don’t want to make a feature of the fridge, but still it has to be central for ease of use. You could, of course, build it into a cupboard but it’s not always the best solution. Built-in, hidden fridges are normally quite shallow and you can’t fit that pizza box in.
TIP number 1: if you’re having a built-in fridge, use a good handle on the door. It needs to have a stronger fix to the door compared to a normal cupboard and it needs to be easy to grab onto.
TIP number 2: Try to put a benchtop close to the fridge so you can put shopping away easily. You will also be able to get several things out without dropping anything. Bonus points for having this benchtop double as your prep zone.
Non-consumables: we’re talking about everything else you need to store. Keep the other zones in mind when doing this. Put the things you use most often in easy reach. Put the things like the “good” cutlery set, the birthday candles, and other special occasion items in a location high up or low down.
Everyone’s got to have an odds and ends drawer in their house. The thingamajigs you’re not sure what to do with get chucked in there. Pens, rubber bands, batteries, sticky tape, mysterious electrical things, the list goes on. Try and re-arrange it to make it easier to find things.
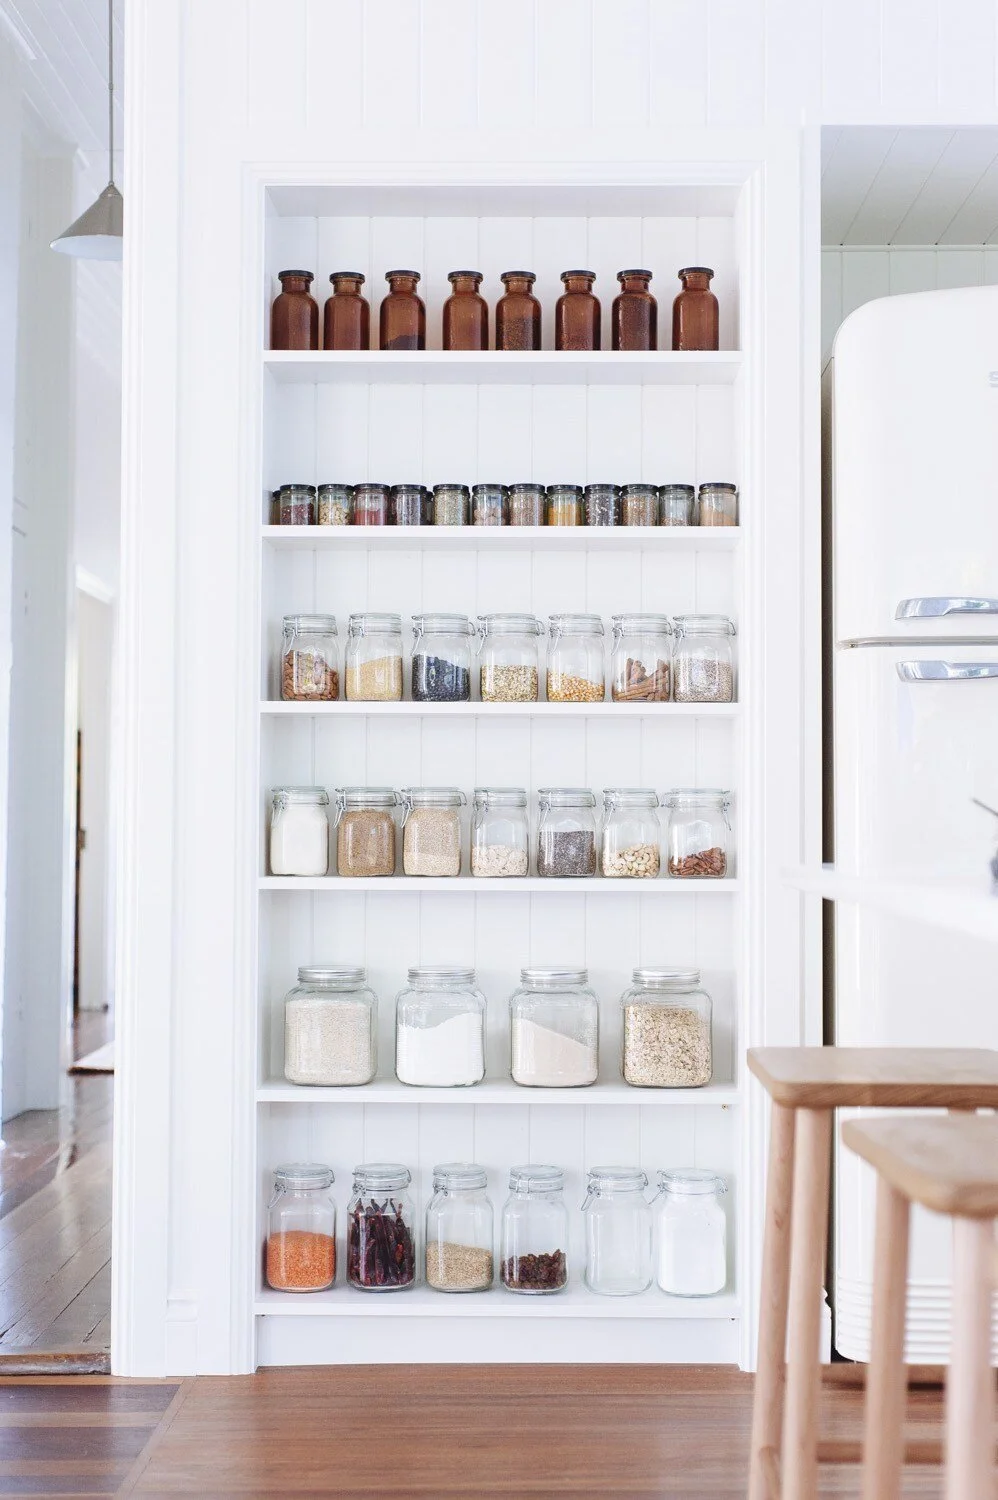
Family kitchen in Byron Bay: Storage Zone | Architect: Sanctuary Design Studio
Optional zones:
Tea & Coffee Zone
I am a coffee drinker and having a dedicated area for it is so handy. Especially when I'm half a sleep in the mornings and almost blind. I use a fancy machine that stays plugged in off to the side, in my walk-in pantry. It’s also close to the microwave that I use to heat up the milk. You might have a kettle that’s plugged in near the sink so it’s easy to fill up. Whatever the case, have everything you need (such as mugs and sugar) nearby and perhaps out of the way of the main activities in the kitchen.

Country kitchen: Coffee Zone | wellness accommodation in central Victoria: Acre of Roses | Styling: Belle Bright Project
Drinks Bar Zone
We’re talking about beer, wine, spirits, cocktails, whatever your poison. Maybe you like to entertain. Maybe you’re precious about the ambient temperature required for wine storage. Maybe a separate bar fridge for the beers needed because there’s not enough room in the main fridge. Maybe healthy smoothies are more your thing. Make a special area for drinks if you have room in the kitchen. And don’t forget H2O. If you need a water cooler, try to allocate a spot for it.

A nook for entertaining, just off the kitchen: Drinks Bar Zone | interior design: Nina Maya Interiors
Breakfast Bar Zone
Do you want to be able to perch somewhere quickly in the morning to eat breakfast? Or have a quick snack during the day? Maybe you’d like an area where someone can sit down and chat to you while you cook. A breakfast bar is traditionally a raised area, along the back of a bench. But now many people are opening up their spaces and making it the same level as the bench.
If you’re going to be using this for most meals, or you’re not particularly a fan of climbing up onto stools, think about lowering the area to dining table height. Different height benchtops in a kitchen design are not only ergonomic but also add interest to the space.

West Elm Cora Leather Counter Stool: Breakfast Bar Zone | Season 3 loft space of Queer Eye | Designer: Bobby Berk
Electronic Devices Zone
Do you need to set up a laptop or tablet to look up recipes? Need a spot for kids to play or do homework? Need to charge your phone, check your messages, watch Youtube, the list goes on. Let’s face it, electronic devices are in every room in the house. You may as well keep them in mind when planning a well thought out space. Make sure there’s a power point in the most logical places. The side of an island bench is a good one.

Charge your devices in a drawer: Electronic Devices Zone | fitting: Hafele Docking Drawer
Serving Food Zone
You might like to have some bench space allocated where you “plate up”. It’s not always practical to use your prep zone for this. You may not have time to clean it up before you need to put plates there. So store your plates, bowls, cutlery, anything you serve with just below or above the serving bench, if you can.

Gantry style shelving above bench: Serving Food Zone | interior design: Doherty Design Studio
Ok, I’ve got some homework for you. You're going to plan your own Work Zones.
First draw up a floor plan with the basic shapes of your kitchen, or get someone to help you. Use the space that you have available and put the things on the plan that can't be moved. For example, the sink may have to stay put because you’re not moving the plumbing.
Now zone up the floor plan into different sections according to the activities required. Include cleaning, prep work, cooking, pantry, and anything else important. Use coloured pencils if you like. This will help you work out where to locate your appliances, your benchtops and cabinets.
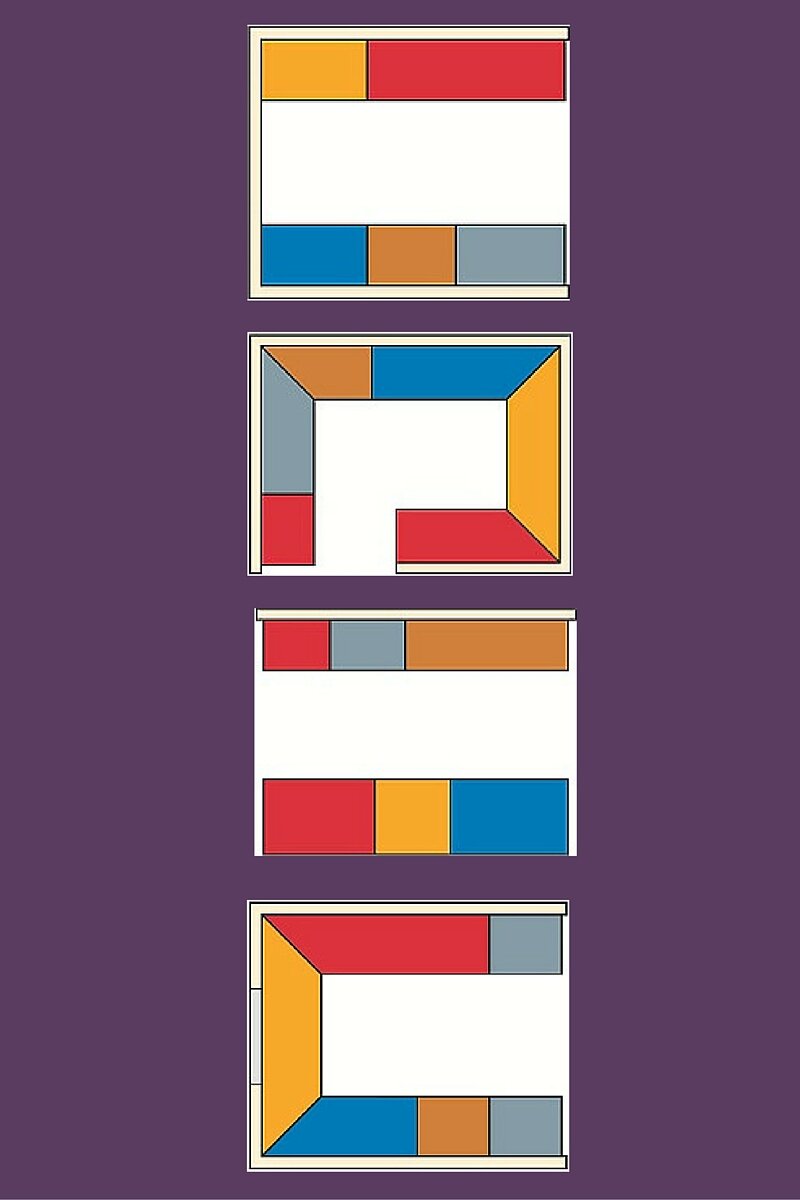
Here's some examples of zone planning on different layouts.
blue = cleaning zone, yellow = preparation zone, red = cooking zone, grey = food storage, orange = storage for everything else
Now you'll know where to store everything and your work flow will be the most efficient.
TIP: Try to visualise yourself cooking something in the kitchen layout you've created. I like to imagine myself making scrambled eggs :) Walk yourself through it step by step. From getting it all out, prep, cooking, and cleaning up.
Is it going to be a conveniently arranged kitchen?
I'd love to hear your thoughts about using Work Zones to design a kitchen layout. Leave a comment below.